Review autogenerated asset checks
You may have noticed that while configuring our dbt assets, we didn’t define anything related to tests. And yet, our dbt project includes them—specifically for the stg_zones model:
version: 2

models:
  - name: stg_trips
    description: The trips source table, cleaned up and decoded
    columns:
      - name: pickup_datetime
        description: The pickup datetime
      - name: dropoff_datetime
        description: The dropoff datetime
      - name: passenger_count
        description: The passenger count
      - name: trip_distance
        description: The trip distance
      - name: pickup_zone_id
        description: The pickup location id
      - name: dropoff_zone_id
        description: The dropoff location id
      - name: fare_amount
        description: The fare amount
      - name: total_amount
        description: The total amount
  - name: stg_zones
    description: The taxi zones, with enriched records and additional flags
    columns:
      - name: zone_id
        description: The location id
        tests:
          - not_null
      - name: borough
        description: The borough
        tests:
          - accepted_values:
              values:
                - Manhattan
                - Bronx
                - Brooklyn
                - Queens
                - Staten Island
                - EWR
      - name: zone
        description: The zone
The good news: no extra configuration is required to include these tests in Dagster. When Dagster parses the dbt project, it automatically:
- Detects any dbt tests declared in the project.
- Converts them into asset checks linked to the Dagster asset that represents the model.
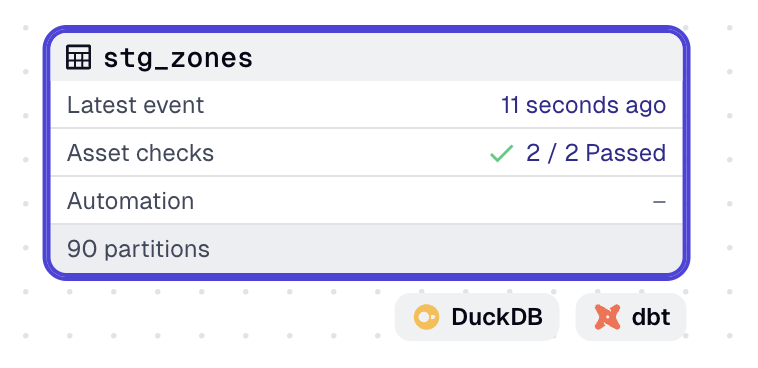
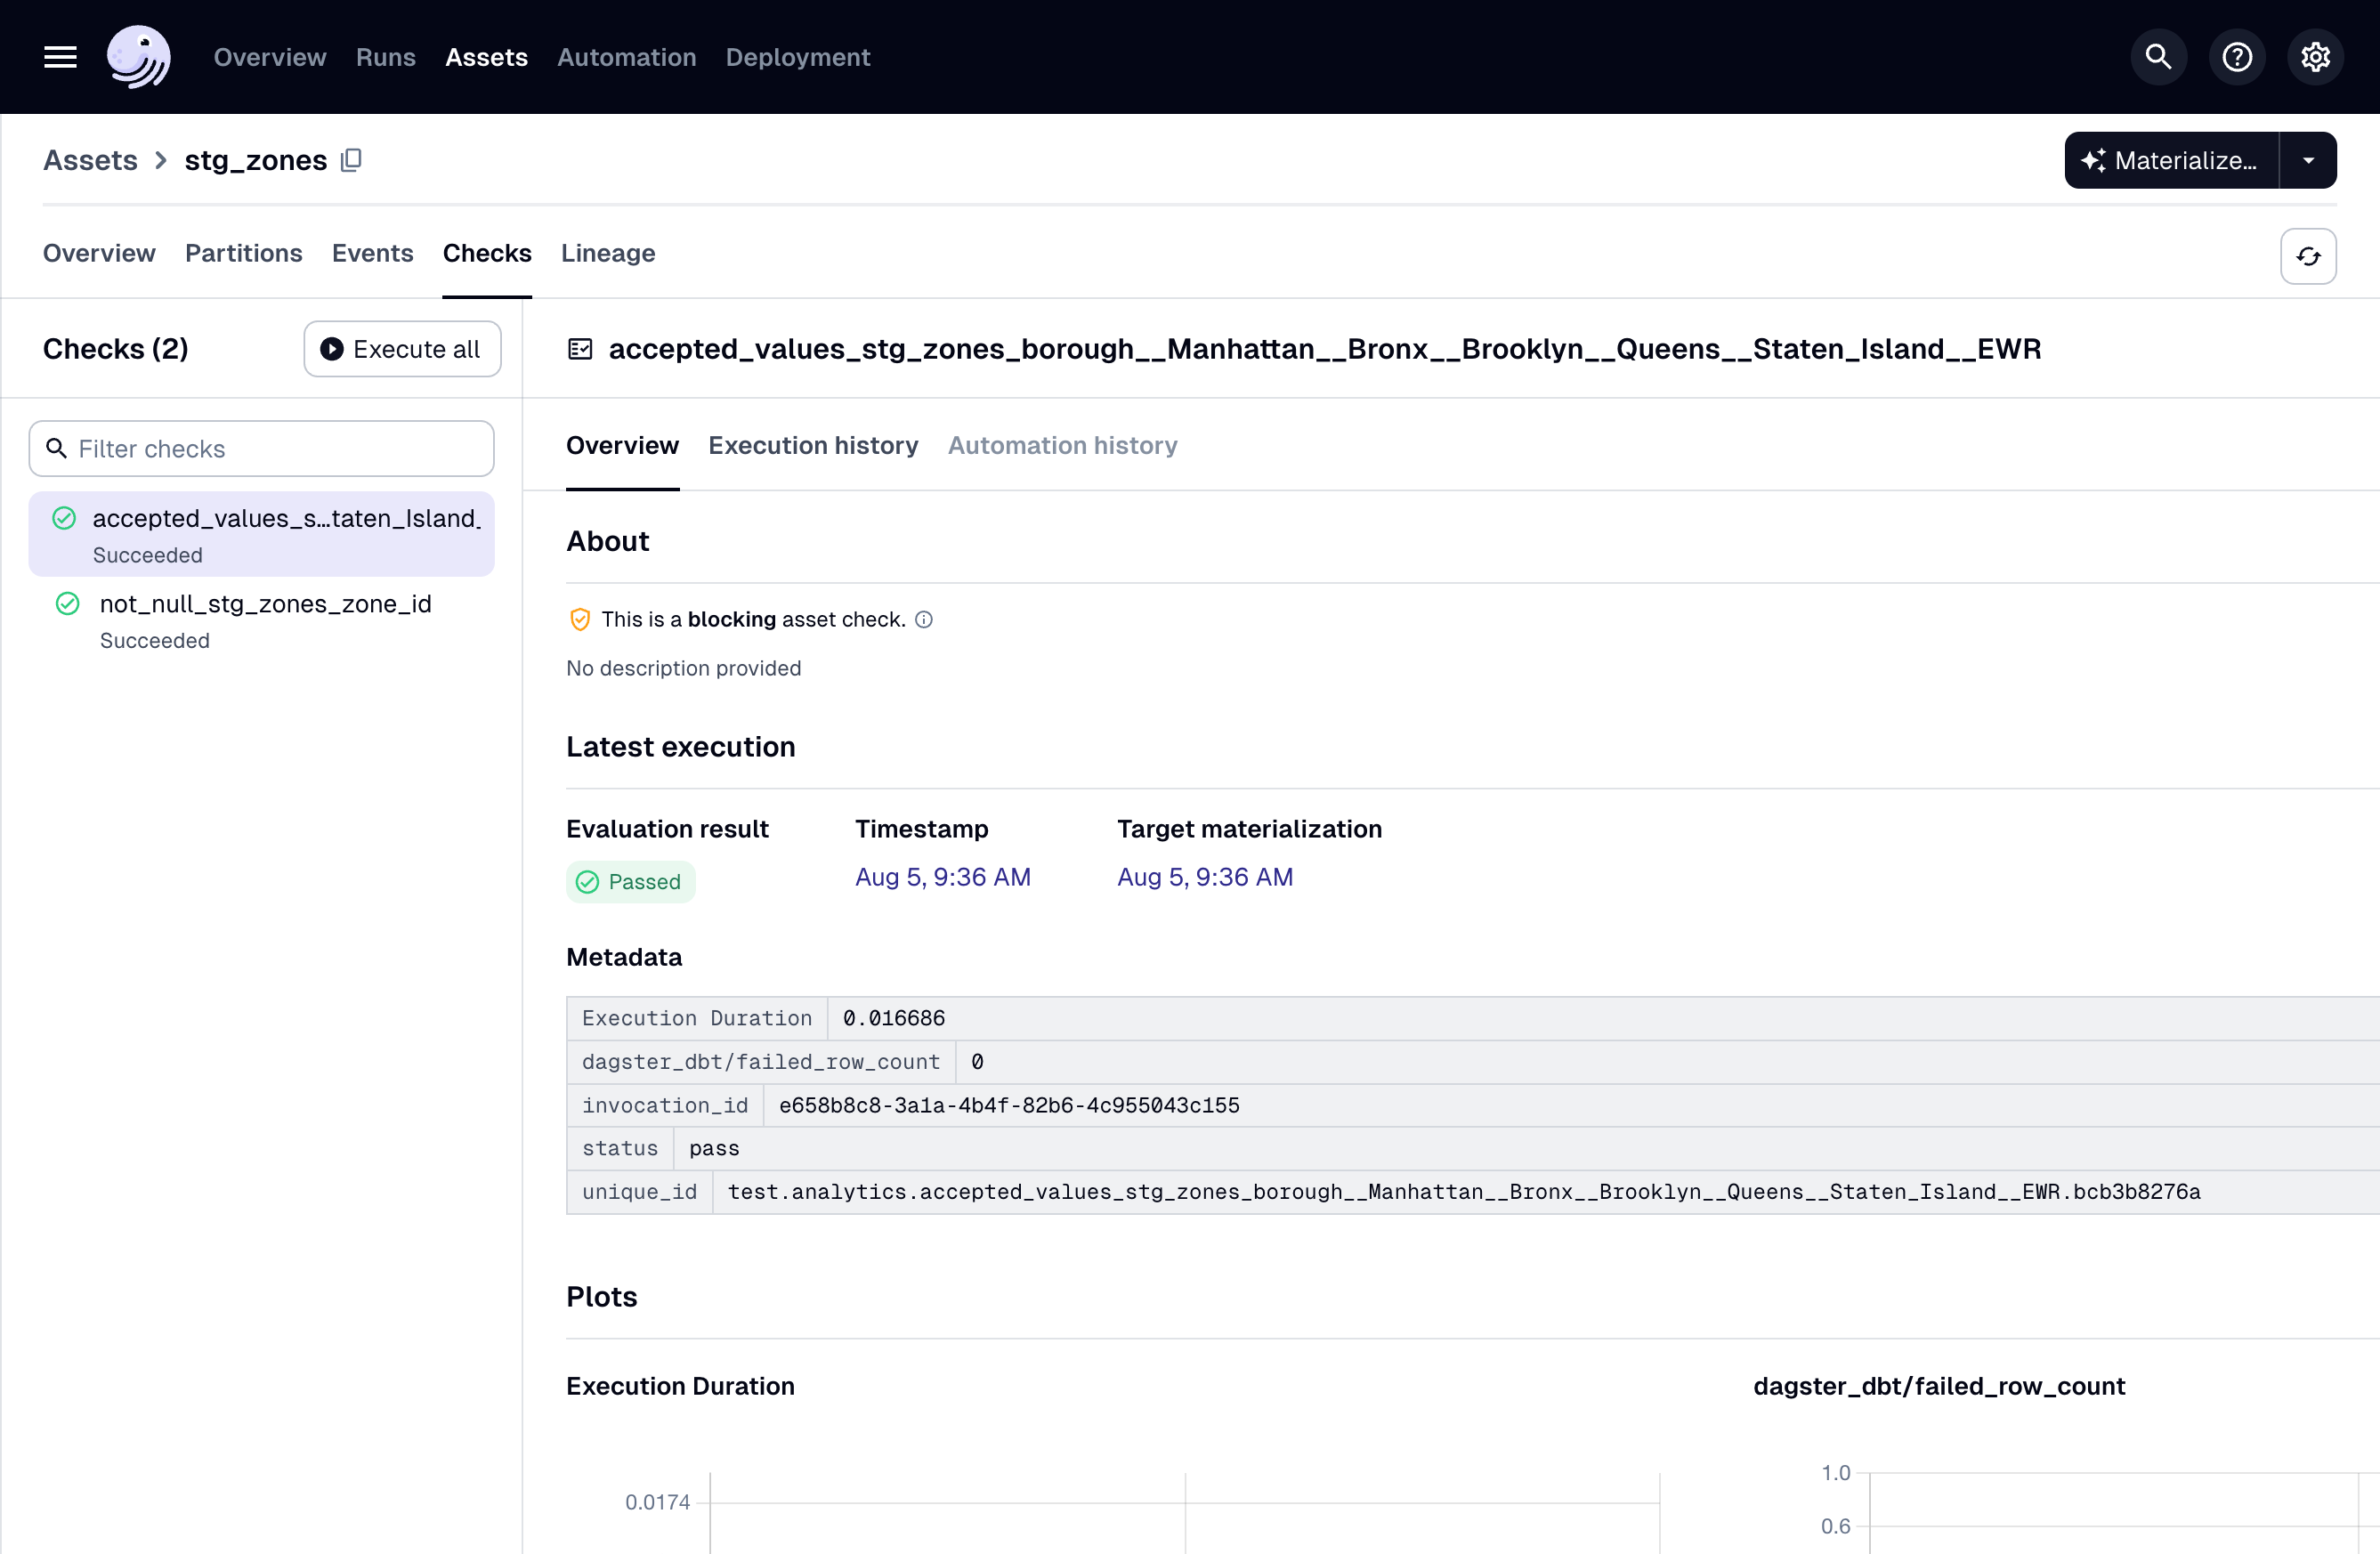
For example, the stg_zones model defines two tests in its YAML file. Dagster registers these as two separate asset checks on the stg_zones asset.

In the UI, you can see the two asset checks tied to the model. When the asset runs, its underlying dbt tests execute as well, and their results are recorded:
Once your dbt project is integrated this way, the Asset Catalog in Dagster shows both lineage and quality signals:
- Materialization history (successful or failed runs).
- A complete history of associated tests, showing which checks passed or failed over time.
This unified view helps you monitor both data freshness and data quality, catching regressions or upstream issues early.
Next steps
- Continue this example with managing the project.