Peer the Airflow instance with a Dagster code location
If you are just getting started with Airlift, we recommend using the new Airlift component.
In the setup step, we created a virtual environment, installed Dagster and the tutorial example code, and set up a local Airflow instance. Now we can start writing Dagster code.
We call the first stage of migration from Airflow to Dagster the "peering" stage, since we will "peer" the Airflow instance with a Dagster code location, which will create an asset representation of each Airflow DAG that you can view in Dagster. This step does not require any changes to your Airflow instance.
Install dagster-airlift
First, you will want a new shell and navigate to the same directory. You will need to set up the dagster-airlift package in your Dagster environment:
source .venv/bin/activate
uv add 'dagster-airlift[core]' dagster-webserver dagster
Create asset representations of DAGs in Dagster
Next, use the build_defs_from_airflow_instance function to create a Definitions object. Copy the following code into the empty tutorial_example/dagster_defs/definitions.py file:
import dagster_airlift.core as dg_airlift_core

defs = dg_airlift_core.build_defs_from_airflow_instance(
    airflow_instance=dg_airlift_core.AirflowInstance(
        # other backends available (e.g. MwaaSessionAuthBackend)
        auth_backend=dg_airlift_core.AirflowBasicAuthBackend(
            webserver_url="http://localhost:8080",
            username="admin",
            password="admin",
        ),
        name="airflow_instance_one",
    )
)
This function creates:
- An external asset representing each Airflow DAG. This asset is marked as materialized whenever a DAG run completes.
- A sensor that polls the Airflow instance for operational information. This sensor is responsible for creating materializations when a DAG executes and must remain on in order to properly update execution status.
Initiate an asset materialization in Dagster from Airflow
Next, set up some environment variables, then run dagster dev to start Dagster pointed at the asset created from the Airflow DAG:
# Set up environment variables to point to the airlift-migration-tutorial directory on your machine
export TUTORIAL_EXAMPLE_DIR=$(pwd)
export TUTORIAL_DBT_PROJECT_DIR="$TUTORIAL_EXAMPLE_DIR/tutorial_example/shared/dbt"
export AIRFLOW_HOME="$TUTORIAL_EXAMPLE_DIR/.airflow_home"
dagster dev -f tutorial_example/dagster_defs/definitions.py

Initiate a run of the rebuild_customers_list DAG in Airflow:
airflow dags backfill rebuild_customers_list --start-date $(shell date +"%Y-%m-%d")
When this run has completed in Airflow, you should be able to navigate to the Dagster UI and see that Dagster has registered an asset materialization corresponding to that run:

Clean the Airflow and Dagster run history
Later in this tutorial, you will need to run the rebuild_customers_list DAG again, so go ahead and run the following command to clean the Airflow and Dagster run history. This command deletes runs from Airflow and asset materializations from Dagster:
make clean
When the code location loads, Dagster will query the Airflow REST API to build a representation of your DAGs. For Dagster to reflect changes to your DAGs, you will need to reload your code location.
Validate data quality with asset checks
Once you have peered your Airflow DAGs in Dagster, you can add asset checks to your Dagster code. In Dagster, asset checks can be used to validate the quality of your data assets, and can provide additional observability and value on top of your Airflow DAG even before you begin migration.
Asset checks can act as user acceptance tests to ensure that any migration steps taken are successful, as well as outlive the migration itself.
In this example, we're going to add an asset check to ensure that the final customers CSV output exists, and has a nonzero number of rows:
import os
from pathlib import Path

import dagster as dg
import dagster_airlift.core as dg_airlift_core


# Attach a check to the DAG representation asset, which will be executed by Dagster
# any time the DAG is run in Airflow
@dg.asset_check(asset=dg.AssetKey(["airflow_instance_one", "dag", "rebuild_customers_list"]))
def validate_exported_csv() -> dg.AssetCheckResult:
    csv_path = Path(os.environ["TUTORIAL_EXAMPLE_DIR"]) / "customers.csv"

    if not csv_path.exists():
        return dg.AssetCheckResult(
            passed=False, description=f"Export CSV {csv_path} does not exist"
        )

    rows = len(csv_path.read_text().split("\n"))
    if rows < 2:
        return dg.AssetCheckResult(
            passed=False,
            description=f"Export CSV {csv_path} is empty",
            severity=dg.AssetCheckSeverity.WARN,
        )

    return dg.AssetCheckResult(
        passed=True,
        description=f"Export CSV {csv_path} exists",
        metadata={"rows": rows},
    )


defs = dg_airlift_core.build_defs_from_airflow_instance(
    airflow_instance=dg_airlift_core.AirflowInstance(
        # other backends available (e.g. MwaaSessionAuthBackend)
        auth_backend=dg_airlift_core.AirflowBasicAuthBackend(
            webserver_url="http://localhost:8080",
            username="admin",
            password="admin",
        ),
        name="airflow_instance_one",
    ),
    # Pass a Definitions object containing the relevant check, so that it is attached to the DAG
    # asset.
    defs=dg.Definitions(asset_checks=[validate_exported_csv]),
)
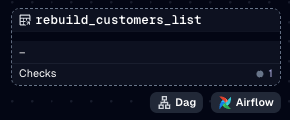
Once you reload the code location, you should see a checks tab indicating the presence of an asset check on the rebuild_customers_list asset:
Run the backfill again:
airflow dags backfill rebuild_customers_list --start-date $(shell date +"%Y-%m-%d")
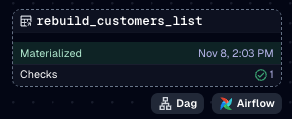
You should see that the asset check executed successfully in Dagster (indicated by the green check mark):
Finally, run make clean to delete runs and materializations:
make clean
Next steps
In the next step, "Observe Airflow tasks", we'll observe asset dependencies within the Airflow DAG.