SCIM provisioning
The System for Cross-domain Identity Management specification (SCIM) is a standard designed to manage user identity information. SCIM provisioning eases the burden of manually provisioning users across your cloud applications. When enabled in Dagster+, SCIM allows you to automatically sync user and team information from your identity provider (IdP) to Dagster+ and back again, ensuring user and team data is always up to date.
With SCIM, you can:
- Create users. Users that are assigned to the Dagster+ application in the IdP will be automatically added to your Dagster+ organization.
- Update user attributes. Updating a user's name or email address in the IdP will automatically sync the change to your user list in Dagster+.
- Remove users. Deactivating or unassigning a user from the Dagster+ application in the IdP will remove them from the Dagster+ organization.
- Push user groups. Groups and their members in the IdP can be pushed to Dagster+ as Teams.
Supported identity providers
Dagster+ currently supports SCIM provisioning for the following identity providers:
Managing users
When SCIM is enabled in Dagster+, a few things about user management will change:
- New users must be added in the IdP. The ability to add new users will be disabled in Dagster+ while SCIM is enabled.
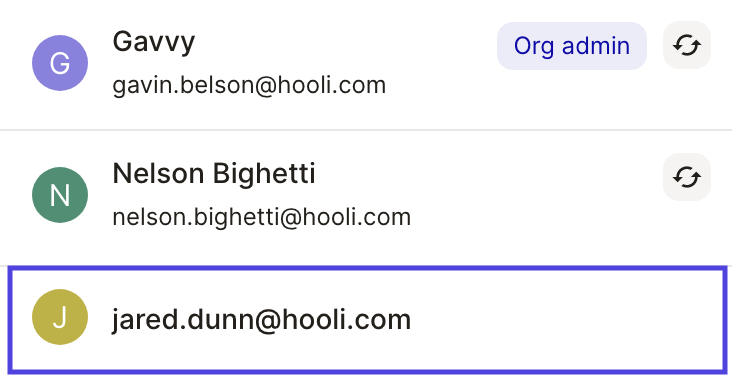
- Only 'unsynced' users can be removed in Dagster+. 'Synced' users will have an icon indicating they're externally managed by the IdP, while unsynced users will not. For example, the first two users in the following image are synced, while the last isn't:
You might see unsynced users in Dagster+ when:
- Users exist in Dagster+, but not in the IdP. In this case, create matching users in the IdP and then provision them. This will link the IdP users to the Dagster+ users.
- Users are assigned to the Dagster+ IdP app before provisioning is enabled. In this case, you'll need to provision the users in the IdP to link them to the Dagster+ users.
If you choose to disable SCIM provisioning in Dagster+, users and teams will remain as-is at the time SCIM is disabled.
Managing teams
In addition to the above user management changes, there are a few things to keep in mind when managing user groups, otherwise known as Dagster+ teams.
User groups in your IdP can be mapped to Dagster+ teams, allowing you to centralize the management of user groups and memberships. When SCIM is enabled:
- Teams can still be managed in Dagster+. You can choose to map and sync these teams to the IdP or administer them solely in Dagster+. Synced groups should be managed only in the IdP, or changes made in Dagster+ may be overwritten when a sync is triggered from the IdP.
- If a group exists only in the IdP and is synced to Dagster+, you'll be prompted to either create a new Dagster+ team with the same name or create a link between the IdP group and an existing team in Dagster+.
- If a group exists only in Dagster+, the group will display in the IdP as an 'external' group with no members. In this case, you can either create a new group in the IdP and link it to an existing Dagster+ team, or choose to manage the team only in Dagster+.
Permissions and SCIM
SCIM controls which users and teams exist in Dagster+, but does not directly control user permissions or roles. Permissions must be managed separately within Dagster+.
Using SCIM groups to manage permissions
If you want to use your IdP to indirectly control permissions, you can:
- Use SCIM to sync IdP groups to Dagster+ teams.
- In the Dagster+ UI, assign roles to those teams via Organization Settings > Teams.
Any user added to an IdP group will inherit the permissions of the corresponding Dagster+ team when synced. For details, see Managing team roles.
Setting a default role for new SSO users
When a new user logs into Dagster+ via SSO for the first time, they are automatically granted a default role. This is configured separately from SCIM using the sso_default_role deployment setting.
By default, new SSO users receive Viewer permissions. To change this, set sso_default_role in your full deployment settings:
sso_default_role: EDITOR
You can also set this to NO_ACCESS to prevent new user accounts from being created automatically on first login.