Defining assets
The most common way to create a data asset in Dagster is by annotating a Python function with an @dg.asset decorator. The function computes the contents of the asset, such as a database table or file.
You can scaffold assets from the command line by running dg scaffold defs dagster.asset <path/to/asset_file.py>. For more information, see the dg CLI docs.
An asset definition includes the following:
- An
AssetKey, which is a handle for referring to the asset. - A set of upstream asset keys, which refer to assets that the contents of the asset definition are derived from.
- A Python function, which is responsible for computing the contents of the asset from its upstream dependencies and storing the results.
Asset decorators
Dagster has four types of asset decorators:
| Decorator | Description |
|---|---|
@asset | Defines a single asset. See an example. |
@multi_asset | Outputs multiple assets from a single operation. See an example. |
@graph_asset | Outputs a single asset from multiple operations without making each operation itself an asset. See an example. |
@graph_multi_asset | Outputs multiple assets from multiple operations |
Defining operations that create a single asset
The simplest way to define a data asset in Dagster is by using the @dg.asset decorator. This decorator marks a Python function as an asset.
import dagster as dg


@dg.asset
def daily_sales() -> None: ...


@dg.asset(deps=[daily_sales], group_name="sales")
def weekly_sales() -> None: ...


@dg.asset(
    deps=[weekly_sales],
    owners=["bighead@hooli.com", "team:roof", "team:corpdev"],
)
def weekly_sales_report(context: dg.AssetExecutionContext):
    context.log.info("Loading data for my_dataset")
In this example, weekly_sales_report is an asset that logs its output. Dagster automatically tracks its dependencies and handles its execution within the pipeline.
Defining operations that create multiple assets
When you need to generate multiple assets from a single operation, you can use the @dg.multi_asset decorator. This allows you to output multiple assets while maintaining a single processing function, which could be useful for:
- Making a single call to an API that updates multiple tables
- Using the same in-memory object to compute multiple assets
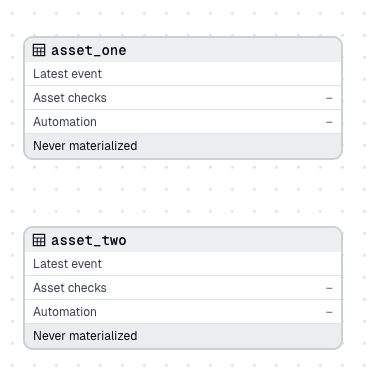
In this example, my_multi_asset is a single function that materializes two assets: asset_one and asset_two. This makes it easier to handle related data transformations together:
import dagster as dg


@dg.multi_asset(specs=[dg.AssetSpec("asset_one"), dg.AssetSpec("asset_two")])
def my_multi_asset():
    yield dg.MaterializeResult(asset_key="asset_one", metadata={"num_rows": 10})
    yield dg.MaterializeResult(asset_key="asset_two", metadata={"num_rows": 24})
The function my_multi_asset produces two separate assets that appear in your asset graph:
Note that my_multi_asset is the function name, not an asset itself. When you materialize either asset_one or asset_two, the my_multi_asset function is executed.
Defining multiple operations that create a single asset
For cases where you need to perform multiple operations to produce a single asset, you can use the @dg.graph_asset decorator. This approach encapsulates a series of operations and exposes them as a single asset, allowing you to model complex pipelines while only exposing the final output.
from random import randint

import dagster as dg


@dg.op(
    retry_policy=dg.RetryPolicy(
        max_retries=5,
        delay=0.2,  # 200ms
        backoff=dg.Backoff.EXPONENTIAL,
        jitter=dg.Jitter.PLUS_MINUS,
    )
)
def step_one() -> int:
    if randint(0, 2) >= 1:
        raise Exception("Flaky step that may fail randomly")
    return 42


@dg.op
def step_two(num: int):
    return num**2


@dg.graph_asset
def complex_asset():
    return step_two(step_one())
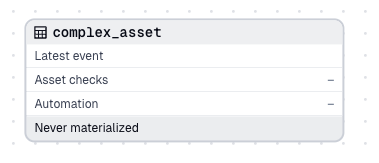
In this example, complex_asset is an asset that's the result of two operations: step_one and step_two. These steps are combined into a single asset, abstracting away the intermediate representations:
Asset context
When defining an asset, you can optionally provide a first parameter, context. When this parameter is supplied, Dagster will supply an AssetExecutionContext object to the body of the asset which provides access to system information like loggers and the current run ID.
For example, to access the logger and log an info message:
import dagster as dg


@dg.asset
def context_asset(context: dg.AssetExecutionContext):
    context.log.info(f"My run ID is {context.run.run_id}")
    ...
Asset code versions
Assets may be assigned a code_version. Versions let you help Dagster track what assets haven't been re-materialized since their code has changed, and avoid performing redundant computation.
@dg.asset(code_version="1")
def asset_with_version():
    with open("data/asset_with_version.json", "w") as f:
        json.dump(100, f)
When an asset with a code version is materialized, the generated AssetMaterialization is tagged with the version. The UI will indicate when an asset has a different code version than the code version used for its most recent materialization.
Assets with multi-part keys
Assets are often objects in systems with hierarchical namespaces, like filesystems. Because of this, it often makes sense for an asset key to be a list of strings, instead of just a single string. To define an asset with a multi-part asset key, use the key_prefix argument with a list of strings. The full asset key is formed by prepending the key_prefix to the asset name (which defaults to the name of the decorated function).
import dagster as dg


@dg.asset(key_prefix=["one", "two", "three"])
def upstream_asset():
    return [1, 2, 3]


@dg.asset(ins={"upstream_asset": dg.AssetIn(key_prefix=["one", "two", "three"])})
def downstream_asset(upstream_asset):
    return upstream_asset + [4]
Next steps
- Learn how to model ETL pipelines and other multi-step processes in Modeling ETL pipelines with assets
- Enrich Dagster's built-in data catalog with asset metadata
- Learn to pass data between assets
- Learn to use a factory pattern to create multiple, similar assets